Tuesday, August 30, 2016
Project PiGear v1.0: Portable PI / handheld retro arcade system
After winning a few bids on a handful of busted Gamegears on ebay, I ended up restoring 2 of them (by recapping and swapping out some components). This is the result of the others.
This will serve as a prototype and reference for future projects, which will incorporate a custom designed 3D printed case, that will house the same hardware.
Description:
A portable, robust, handheld, raspberry pi based retro arcade system that also doubles as a media player.
Main Components:
- Raspberry Pi 3
- Highly modified SEGA Gamegear case
- Waveshare 5 inch HDMI LCD screen
- Adafruit Powerboost 1000C
- Adafruit 3.7W Class D Stereo Amplifier
- 8 OHM 1W stereo speakers x2
- Teensy 2.0 USB development board
Batteries:
- Revtronic 2600mAh Li-On battery x2
Storage:
- Kingston 64 GB USB Drive
- Samsung Extreme 64 GB MicroSD
Misc/Other:
- 3.5mm Audio jack
- Female USB socket x2
- LED red
- Adafruit Breadboard-friendly SPDT slide switch
- 300 OHM resistor x2
- .100" spacing 2 pin header strip x4
- .100" spacing proto-board
- Tactile switches x4
- Superglue (plastic surgery)
- JB Weld (Epoxy)
- 4-40 screws
- 4-40 standoffs (nylon)
- Copper wire (both stranded and solid Gage 25-30)
- Shrink wraps
- hot glue
Tools used:
- Dremel
- Power drill
- Screwdriver
- Exacto knife
- Wire strippers
- Tweezers
- Needle nose pliers
- Magnifying glass (helping hands)
- METCAL soldering station
- Kester .015" Rosin core solder
Sunday, June 19, 2016
Teensy 2.0 buttons/control using the Bounce2 library.
I am currently working on a raspberry pi 3/gamegear build (Which I plan to start blogging about in the near future hopefully). Well I was in the process of programming my teensy 2.0 the other night, and configuring my buttons. During testing I had noticed that on certain buttons, when I pressed them, I was experiencing multiple unwanted button presses. At first I thought it was something to do with my code, which was based off of some sketch I had found on the internet.
Turns out it was being caused by what is commonly referred to as "contact bounce". This is where the button or switch is literally bouncing on the pad/contacts, each time you press or release it. I did some Googling and I came across a little Arduino/Wiring library known as Bounce2 that handles this problem.
I was able to whip up a little sketch that works very well. Both eliminating bounce, and giving me access to a nice little easy to manage piece of code for all my future handheld projects. It's based on a 12 button setup. You will have to number your pins accordingly, depending on which ones you've wired your buttons to on the teensy.
Enjoy!
https://en.wikipedia.org/wiki/Contact_bounce
http://www.allaboutcircuits.com/textbook/digital/chpt-4/contact-bounce/
https://github.com/thomasfredericks/Bounce2/wiki
https://www.pjrc.com/teensy/td_libs_Bounce.html
https://www.pjrc.com/teensy/pinout.html
https://learn.adafruit.com/raspberry-gear/wiring-front-case
Turns out it was being caused by what is commonly referred to as "contact bounce". This is where the button or switch is literally bouncing on the pad/contacts, each time you press or release it. I did some Googling and I came across a little Arduino/Wiring library known as Bounce2 that handles this problem.
I was able to whip up a little sketch that works very well. Both eliminating bounce, and giving me access to a nice little easy to manage piece of code for all my future handheld projects. It's based on a 12 button setup. You will have to number your pins accordingly, depending on which ones you've wired your buttons to on the teensy.
Enjoy!
References:
/*
Description:
A 12 button input control sketch for the teensy 2.0,
using the Bounce2 library. This sketch eliminates (debounces)
side effects caused by mechanical bounce, such as rapid
fire, multiple undesired button presses etc. It also detects
when the button is being held down, and if so retriggers it.
Written by: Steve Sherrod
Date: 06/19/16
URL: http://retro-rpi.blogspot.com/
*/
// Include the Bounce2 library found here :
// https://github.com/thomasfredericks/Bounce2
#include <Bounce2.h>
#define DEBUG 1 //enable debugging/serial output
#define INTERVAL 5 //button update interval
#define RETRIG_RATE 100 //ms until button is considered being held
//buttons current state and timestamp
int buttonState;
unsigned long buttonPressTimeStamp;
//pin number placeholders
const int pinBtnUp = 10;
const int pinBtnRight = 8;
const int pinBtnDown = 23;
const int pinBtnLeft = 9;
const int pinBtnSelect = 6;
const int pinBtnStart = 4;
const int pinBtnB = 2;
const int pinBtnA = 0;
const int pinBtnY = 1;
const int pinBtnX = 3;
const int pinBtnTrigLeft = 5;
const int pinBtnTrigRight = 7;
const int pinLEDOutput = 11;
//array of pin numbers
byte pins[] = { pinBtnUp, pinBtnRight, pinBtnDown, pinBtnLeft, pinBtnSelect, pinBtnStart,
pinBtnB, pinBtnA, pinBtnY, pinBtnX, pinBtnTrigLeft, pinBtnTrigRight
};
//bounce object placeholders
Bounce btnUp = Bounce();
Bounce btnRight = Bounce();
Bounce btnDown = Bounce();
Bounce btnLeft = Bounce();
Bounce btnSelect = Bounce();
Bounce btnStart = Bounce();
Bounce btnB = Bounce();
Bounce btnA = Bounce();
Bounce btnY = Bounce();
Bounce btnX = Bounce();
Bounce btnTrigLeft = Bounce();
Bounce btnTrigRight = Bounce();
//array of Bounce objects
Bounce buttons[] = {btnUp, btnRight, btnDown, btnLeft, btnSelect, btnStart, btnB, btnA, btnY,
btnX, btnTrigLeft, btnTrigRight};
//array of key presses to be sent
short keys[] = {KEY_U, KEY_R, KEY_D, KEY_L, KEY_ENTER, KEY_TAB, KEY_B, KEY_A, KEY_Y, KEY_X, KEY_P, KEY_Q};
void myset_key1(uint8_t c){Keyboard.set_key1(c);}
void myset_key2(uint8_t c){Keyboard.set_key2(c);}
void myset_key3(uint8_t c){Keyboard.set_key3(c);}
void myset_key4(uint8_t c){Keyboard.set_key4(c);}
void myset_key5(uint8_t c){Keyboard.set_key5(c);}
void myset_key6(uint8_t c){Keyboard.set_key6(c);}
//sendkey function pointers
typedef void KeyFunction_t(uint8_t c);
KeyFunction_t* buttonActive[12];
KeyFunction_t* keyList[] = {myset_key6, myset_key5, myset_key4, myset_key3, myset_key2, myset_key1};
int keySlot = sizeof(keyList) / sizeof(KeyFunction_t*);
//setup the buttons
void setup() {
if (DEBUG)
Serial.begin(57600);
//set pin mode to input on all pins:
for (byte i=0; i< 12; i++) {
pinMode(pins[i], INPUT);
digitalWrite(pins[i],HIGH);
if (DEBUG)
Serial.printf("Pin %d -> input HIGH\n", pins[i]);
//setup our bounce instances
buttons[i].attach(pins[i]); //attach to corresponding pin
buttons[i].interval(INTERVAL);
}
//setup the LED pin
pinMode(pinLEDOutput,OUTPUT);
}
void loop() {
for (byte i=0; i< 12; i++) {
//update buttons
boolean changed = buttons[i].update();
//last action
bool keysPressed = false;
bool keysReleased = false;
//button state changed
if ( changed ) {
//read the update value
int value = buttons[i].read();
if ( value == HIGH) {
//button released
keysReleased = true;
buttonState = 0;
releaseButton(i);
if (DEBUG)
Serial.println("Button released");
} else {
//button pressed
buttonState = 1;
keysPressed = true;
activateButton(i);
if (DEBUG)
Serial.println("Button pressed");
buttonPressTimeStamp = millis();
}
}
//check for long button press and if so retrigger the button
if ( buttonState == 1 ) {
if ( millis() - buttonPressTimeStamp >= RETRIG_RATE ) {
buttonPressTimeStamp = millis();
if (DEBUG)
Serial.println("Button held, retriggering");
}
}
if (keysPressed || keysReleased)
Keyboard.send_now(); //update all the keypresses
}
}
void activateButton(byte index)
{
if (keySlot) //any key slots left?
{
keySlot--; //Push the keySlot stack
buttonActive[index] = keyList[keySlot]; //Associate the keySlot function pointer with the button
(*keyList[keySlot])(keys[index]); //Call the key slot function to set the key value
}
}
void releaseButton(byte index)
{
keyList[keySlot] = buttonActive[index]; //retrieve the keySlot function pointer
buttonActive[index] = 0; //mark the button as no longer pressed
(*keyList[keySlot])(0); //release the key slot
keySlot++; //pop the keySlot stack
}
https://en.wikipedia.org/wiki/Contact_bounce
http://www.allaboutcircuits.com/textbook/digital/chpt-4/contact-bounce/
https://github.com/thomasfredericks/Bounce2/wiki
https://www.pjrc.com/teensy/td_libs_Bounce.html
https://www.pjrc.com/teensy/pinout.html
https://learn.adafruit.com/raspberry-gear/wiring-front-case
Wednesday, March 30, 2016
Setting up a Wireless USB controller for use with Retropie
I recently bought a wireless controller called an "Afterglow PS3 controller". When I got home and went to set it up, I was surprised that it wasn't working right away. I first tried the retropie_setup.sh script, which has built in features for setting up a PS3 (and clones), or an xbox controller. Neither of these options worked for me.
Being a pretty Linux savvy guy, I decided to do a little research and set it up manually. Hopefully this walk-through will help others who have the same problem. This procedure might work for most controllers (unverified).
My setup:
Retropie 3.6
Raspberry PI 3
PDP Afterglow PS3 controller
Lets get started...
Note: This entire procedure can be done via SSH (optional), aside from mapping the controller.
1. Detect and identify your controller:
Unplug, and then immediately plug back in, the wireless dongle (or cable) into your USB on your Rapasberry pi.
Run the following command (hit F4 in main menu to access the terminal):
dmesg
Scroll through the output from dmesg, and see if your controller is listed. (Mine shows as the following):
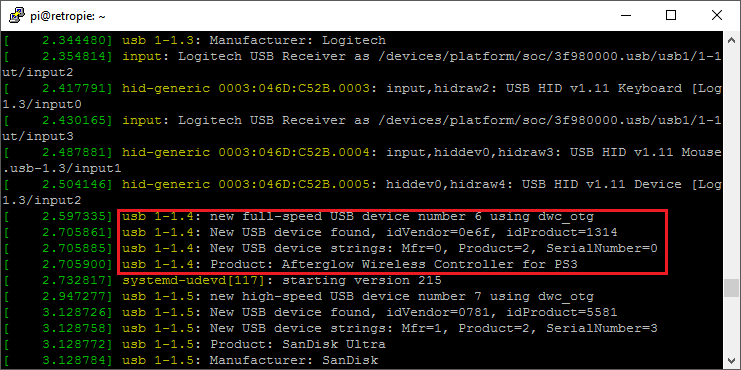
Awesome, it detects and registers our controller as an input device.
Now we need to blacklist the xpad driver (since it conflicts with xboxdrv, which we will setup later) so the kernel doesn't load it.
2. Verify whether or not xpad is loaded
Run the following command:
lsmod

We can see that the xpad driver is indeed loaded. (If it is NOT listed here, you can skip step 3, and move directly to step 5).
Lets go ahead and unload it.
Run the following command to unload the xpad driver:
sudo rmmod xpad3. Blacklist xpad driver via raspi-blacklist.conf file:
Run the following command:
sudo nano /etc/modprobe.d/raspi-blacklist.conf

Add the following text:
blacklist xpad

Save the file and exit the editor (hit Ctrl+o to save, press enter when prompted for filename, and then Ctrl+x to exit)
4. Reboot your pi ("sudo reboot" from the terminal, or "Quit->Reboot System" via main menu)
Once emulationstation is back up and you are in the main menu, press F4 to load the terminal again.
Note: If you run the lsmod command again after you reboot, you should not see xpad loaded at all. If you do, then repeat step 3.
5. Get your controllers "ID"
First, we need to identify the devices vendor:id string, which can be done by doing the following:
- Unplug your USB dongle (or cable) and run the following command:
lsusb

Take note of the number of devices listed, and familiarize yourself with their names.
- Now plug your dongle (or cable) back into the Raspberry PI, and run the same command:
lsusb

As you can see, there is a new device being listed (Known as Logic3 for me). The vendor ID, in my case is "0e6f:1314"
Now lets load up xboxdrv and see if we can get the controller synced, and outputting events.
6. Initialize xboxdrv
xboxdrv should already be installed hopefully. If not, you should be able to install it by running "apt-get install xboxdrv".
Make sure your dongle (or controller) is plugged in, and run the following command (replacing $esp with the string we got from step 5):
sudo xboxdrv --device-by-id $esp --type xbox360

After xboxdrv loads, press some buttons on the controller (You likely need to hit the home, or the sync button first (to connect it) before it'll detect anything).
You should see the following :

As you can see, the controller is now synced, and xboxdrv is processing user input.
Now that the controller is working, we need to configure retropie to autostart xboxdrv.
7. Configure xboxdrv to load at system boot.
We will be editing a file known as rc.local, which will launch xboxdrv for us on each boot.
Edit the file with nano:
sudo nano /etc/rc.local

Add the following text just before the "exit 0" line, using your vendor ID:
xboxdrv --device-by-id 0e6f:1314 --type xbox360 --silent &

Be sure to include the & on the end, so it runs in the background. No need to add sudo on the front, since rc.local is ran as root. --silent tells it to not output anything to the console.
8. Reboot your PI
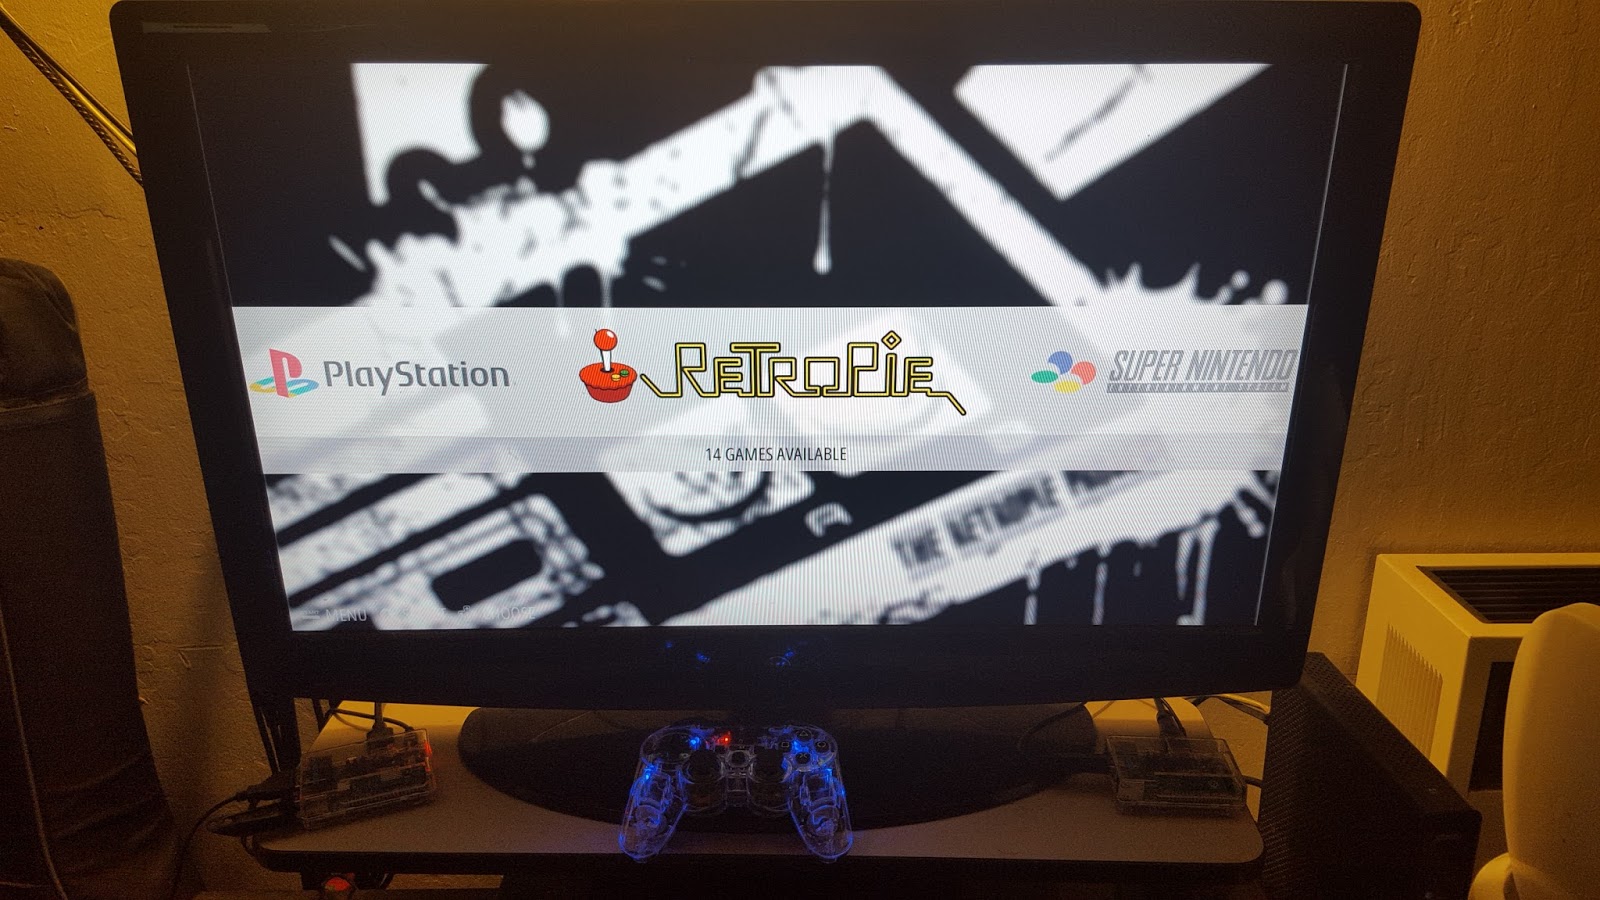
Once emulationstation loads up, hit the home (sync) button on your controller. It should now be connected and no longer flashing. Now we will map the buttons using the menu options. If it already works for you, awesome!
9. Map the controller
Bring up options, from the main menu (using a keyboard or a working controller) and press "Configure input".

Once it loads, press and hold a button on the controller. It should detect it, and run the button mapping utility.

Follow the prompt and map all of your buttons, as you normally would with any controller.
All done!
Whacky controller bug fix
Update 04/03/16:
I was encountering some issues, namely after I exit a game or when trying to hit select (to insert coins) in mame, every time I first launched a game. Basically it would be holding down the top trigger button for some reason, and spazzing out before, and after I played any game.
To fix this simply set the following, in /boot/config.txt:
dwc_otg.speed=1

I hope this example will help others in getting non official controllers working, with Retropie.
I may be writing others in the future, as I tinker with my RPI, and encounter / resolve issues.
Subscribe to:
Posts (Atom)